After 1.5 yrs of not touching my oil paints…

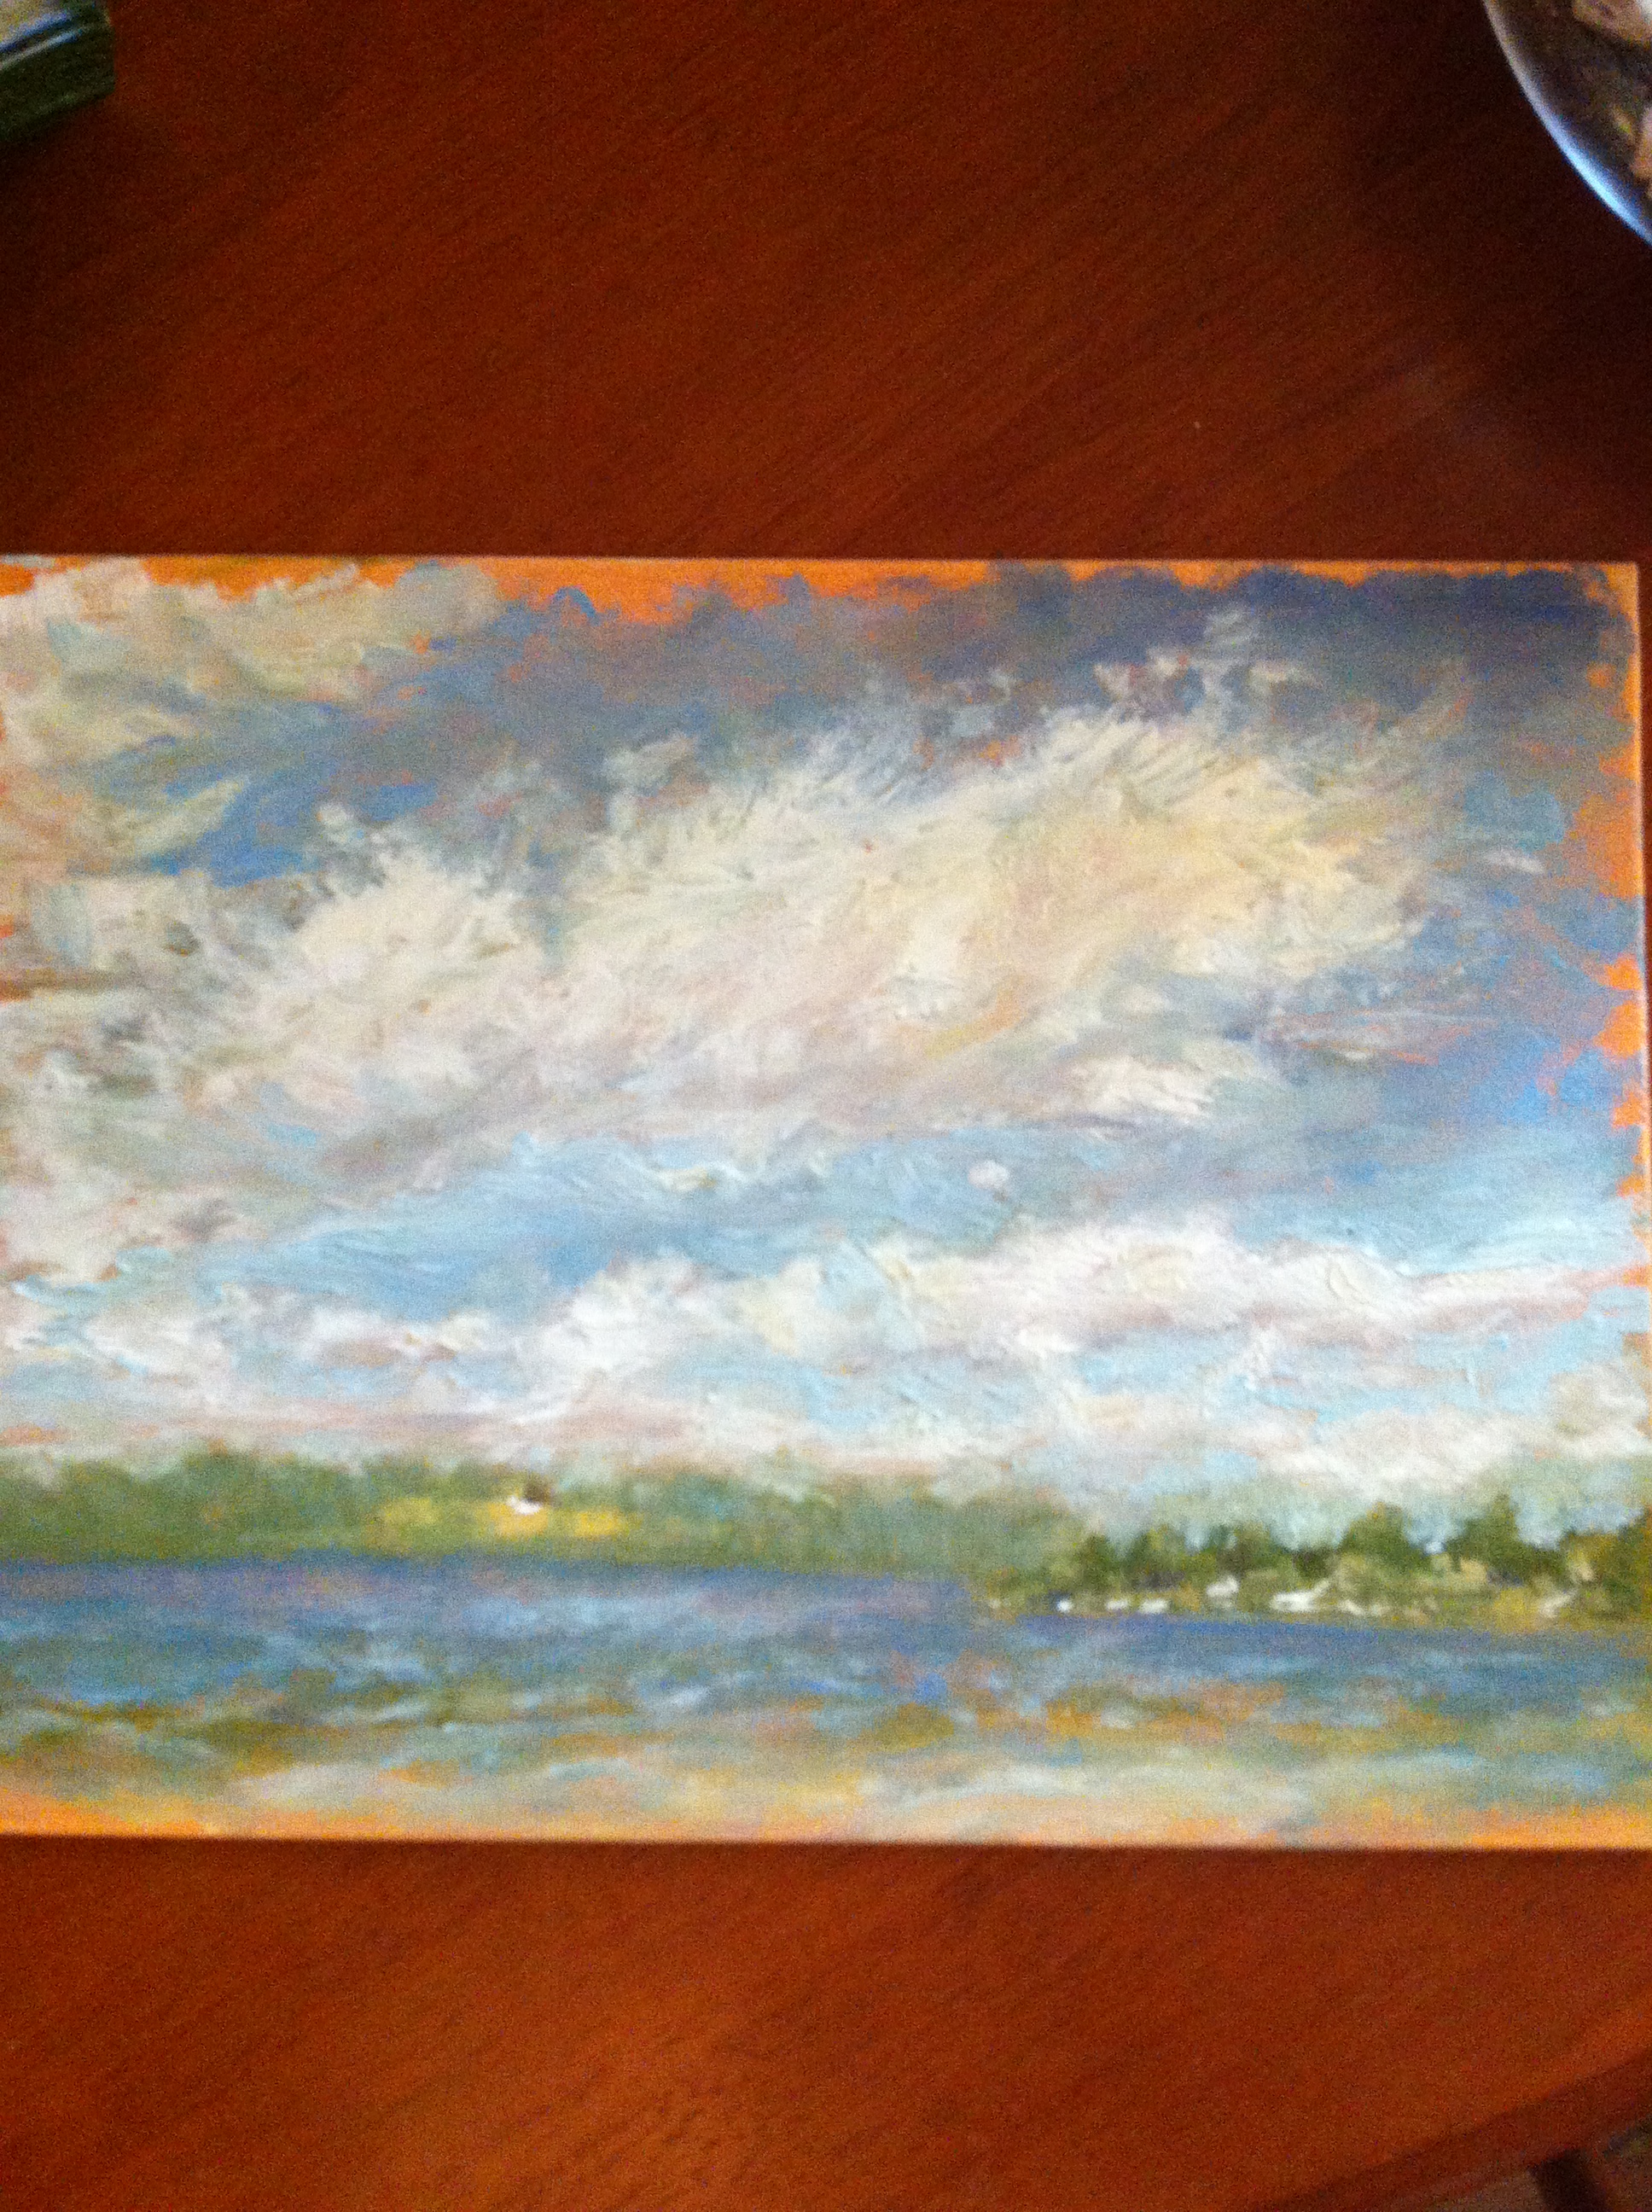
It’s hard for me to enjoy the beautiful scenery of western Minnesota and eastern North Dakota at the end of August without being reminded of great landscape paintings. Invariably, I feel the itch to get out and paint myself. I always temper this urge by telling myself that I will just do, “some quick oil sketches.”

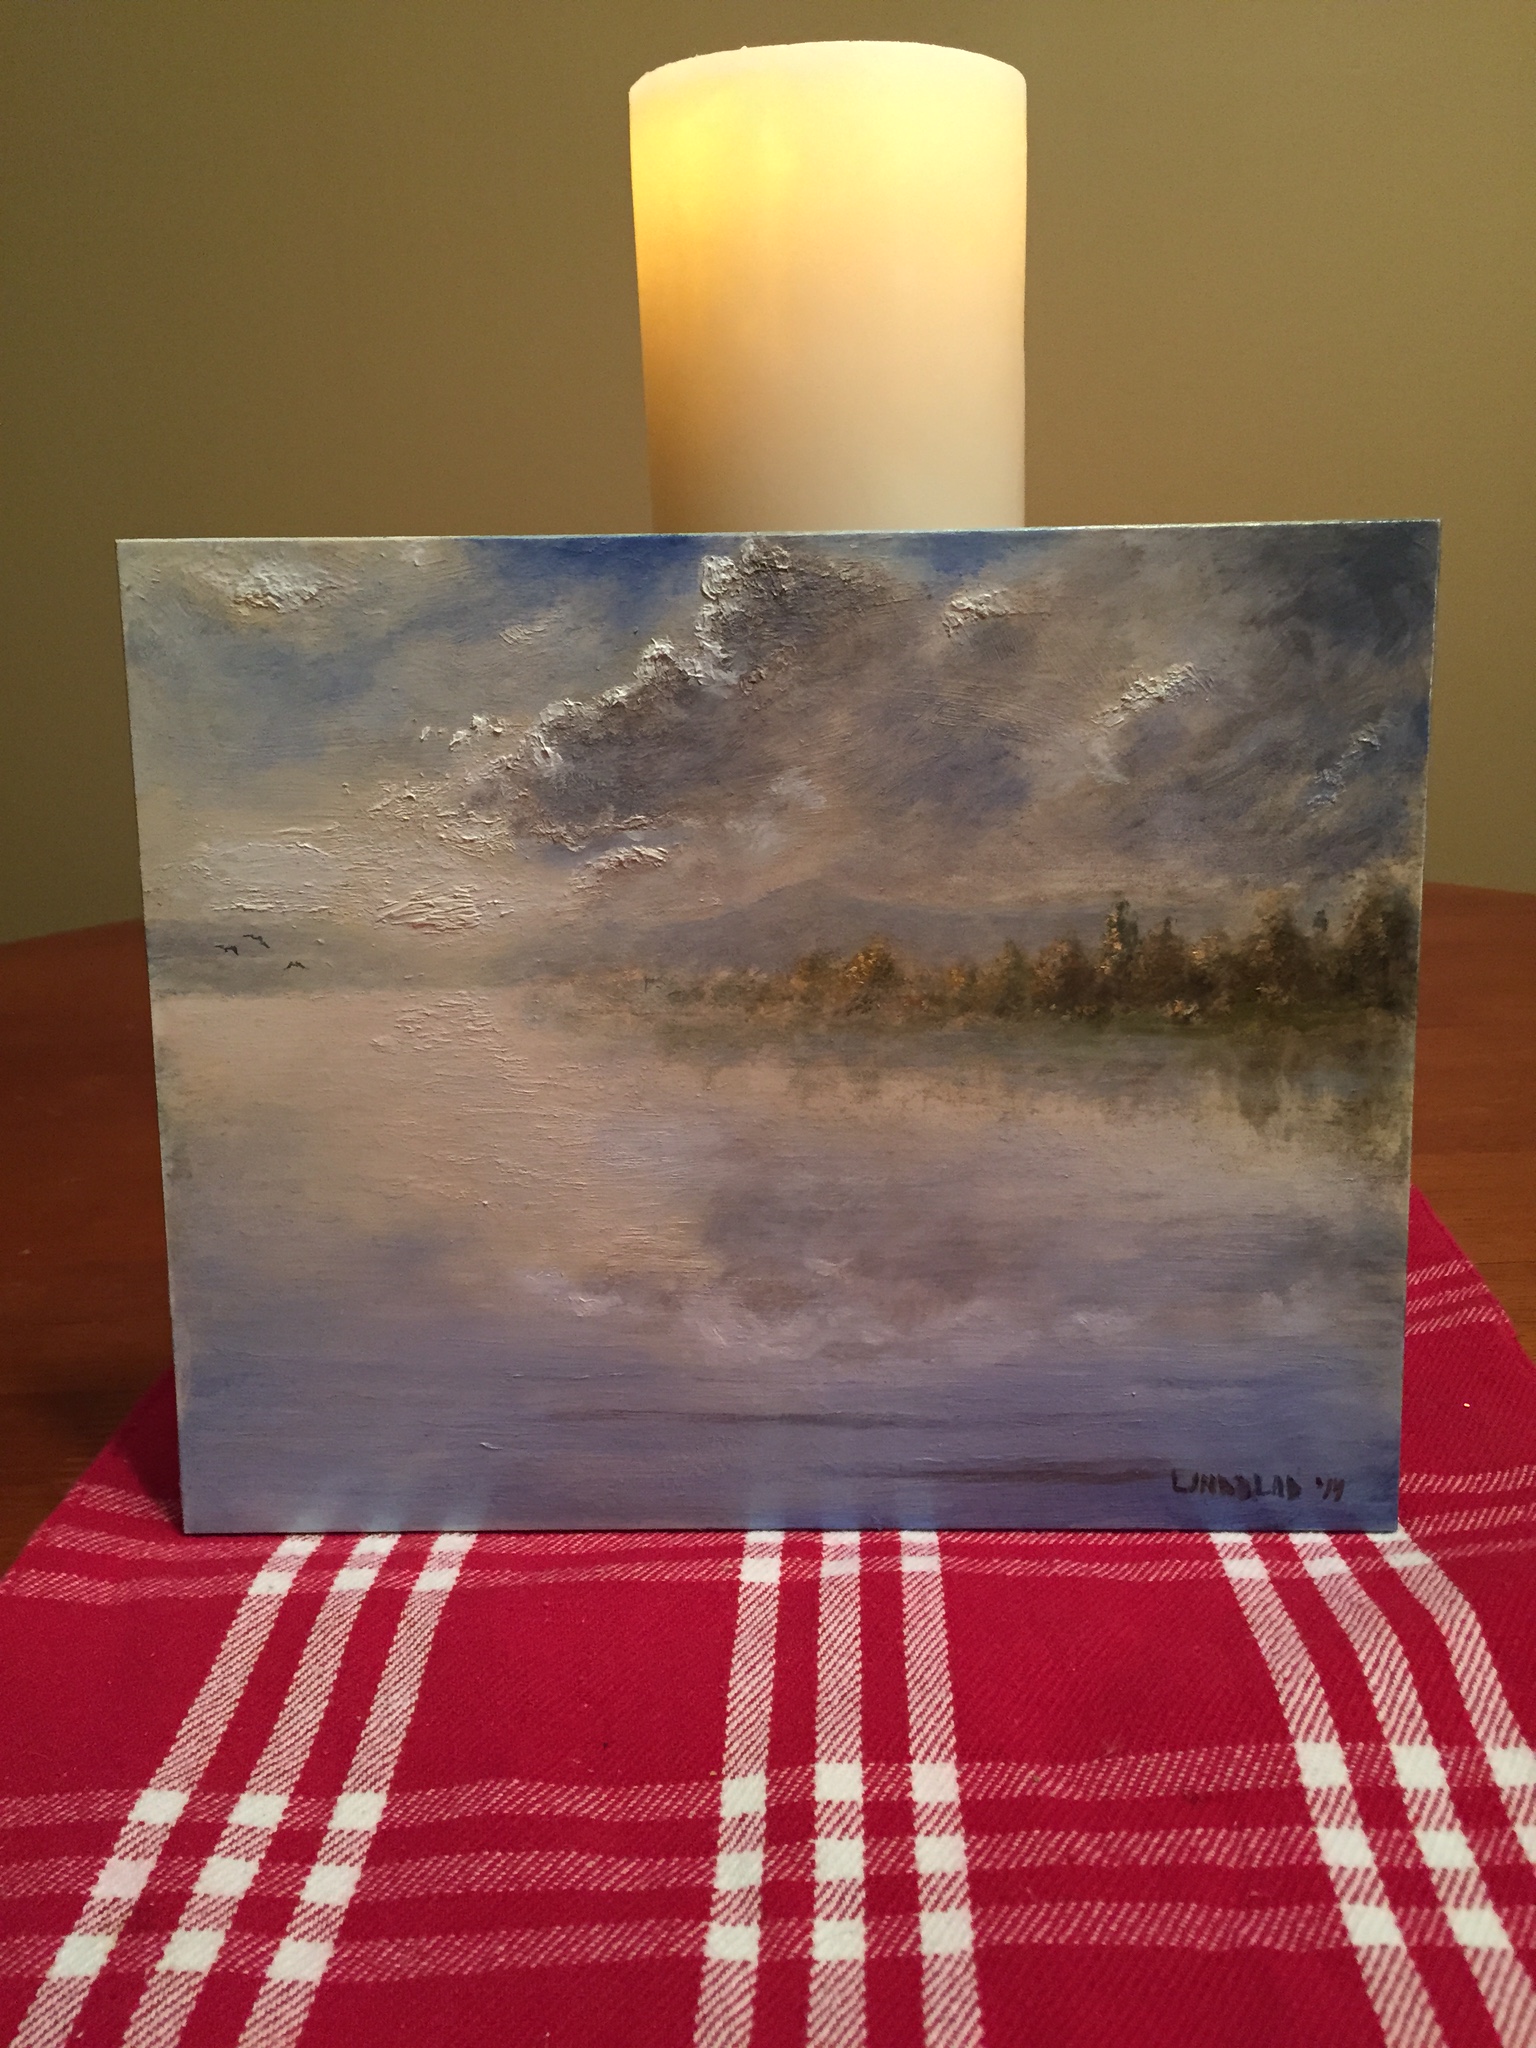
That’s what I told myself the other day before starting this 12×12″ painting, but three sessions later I’m still working on it.


FL-28-08-2016-05-40-58

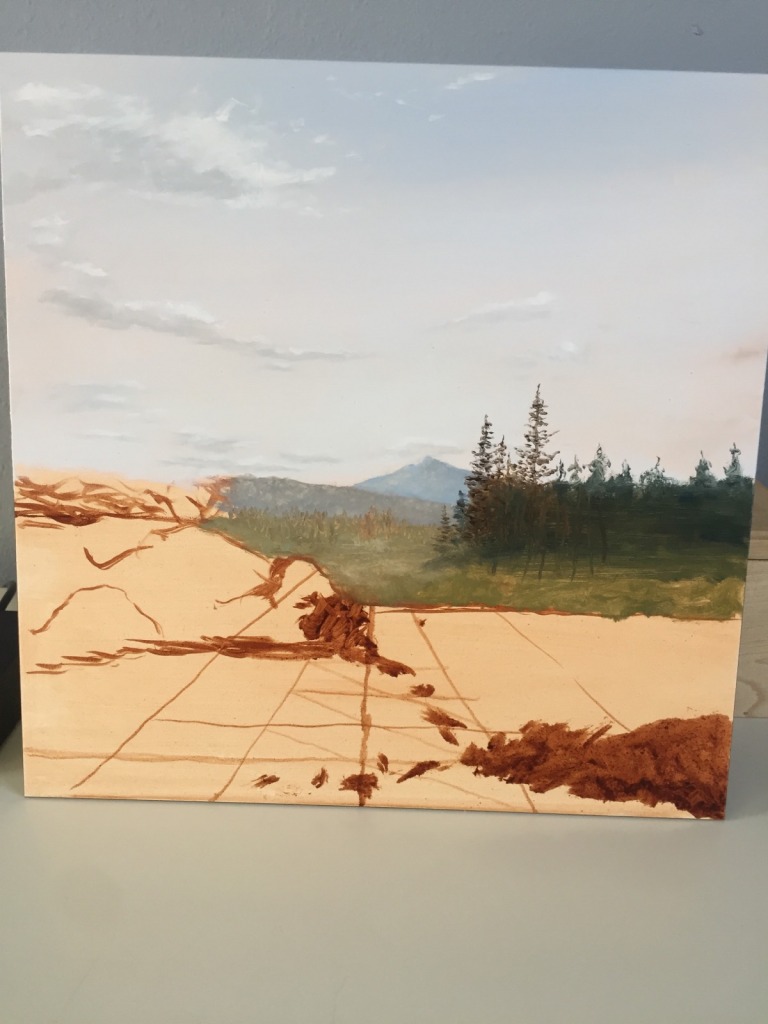
The background is roughed in, and some conifers as well in the middle ground

FL-30-08-2016-09-00-14

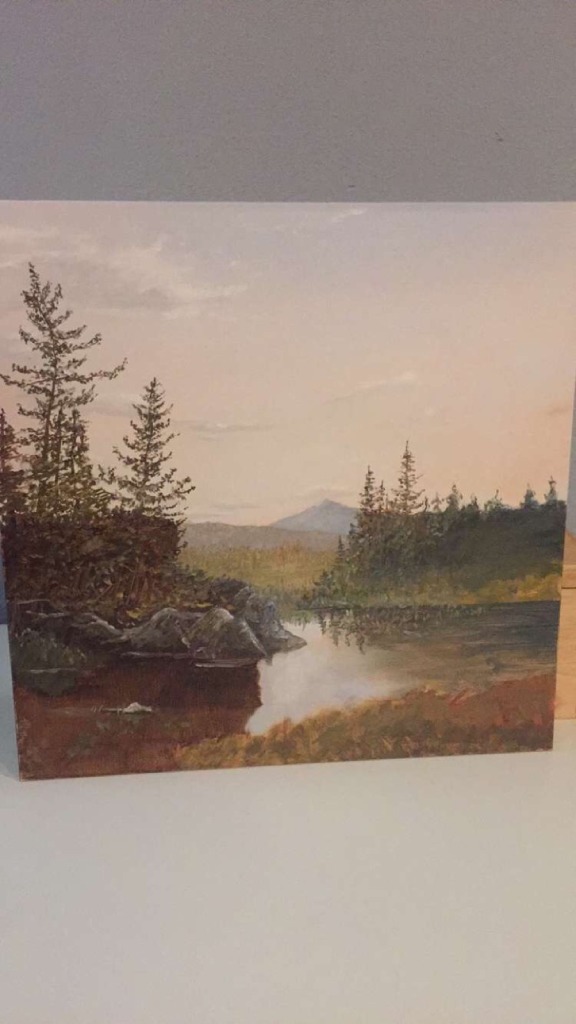
The end of day 1 painting, all of the white space is killed, which helps the eye focus on color relationships

FL-01-09-2016-09-41-03

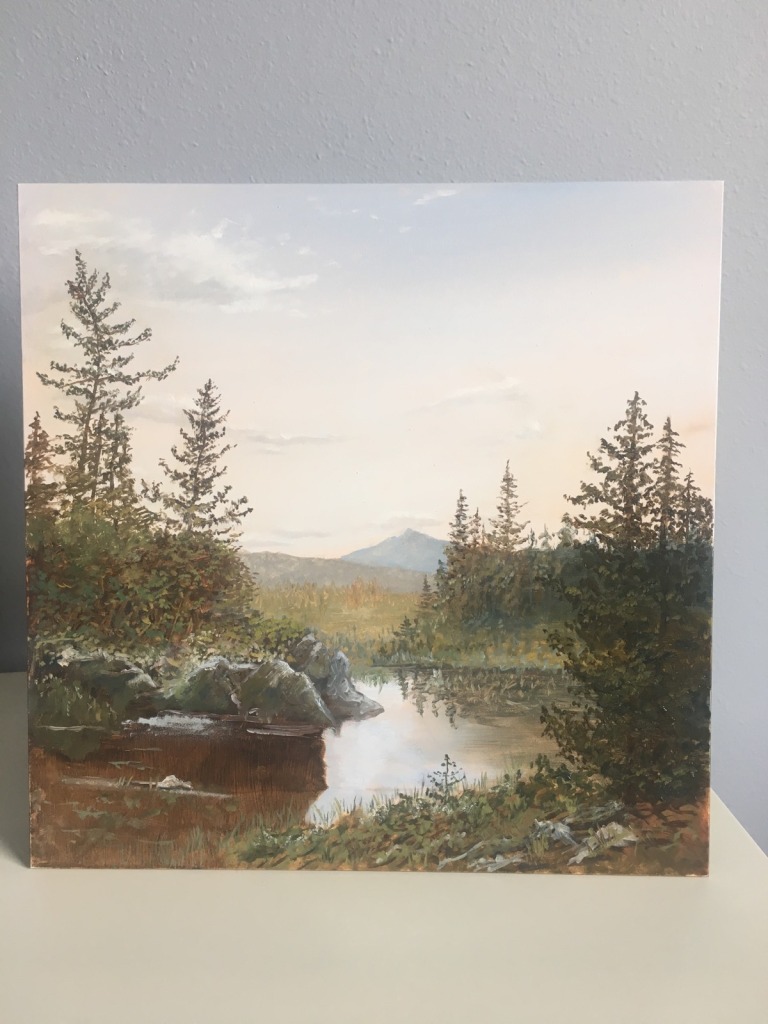
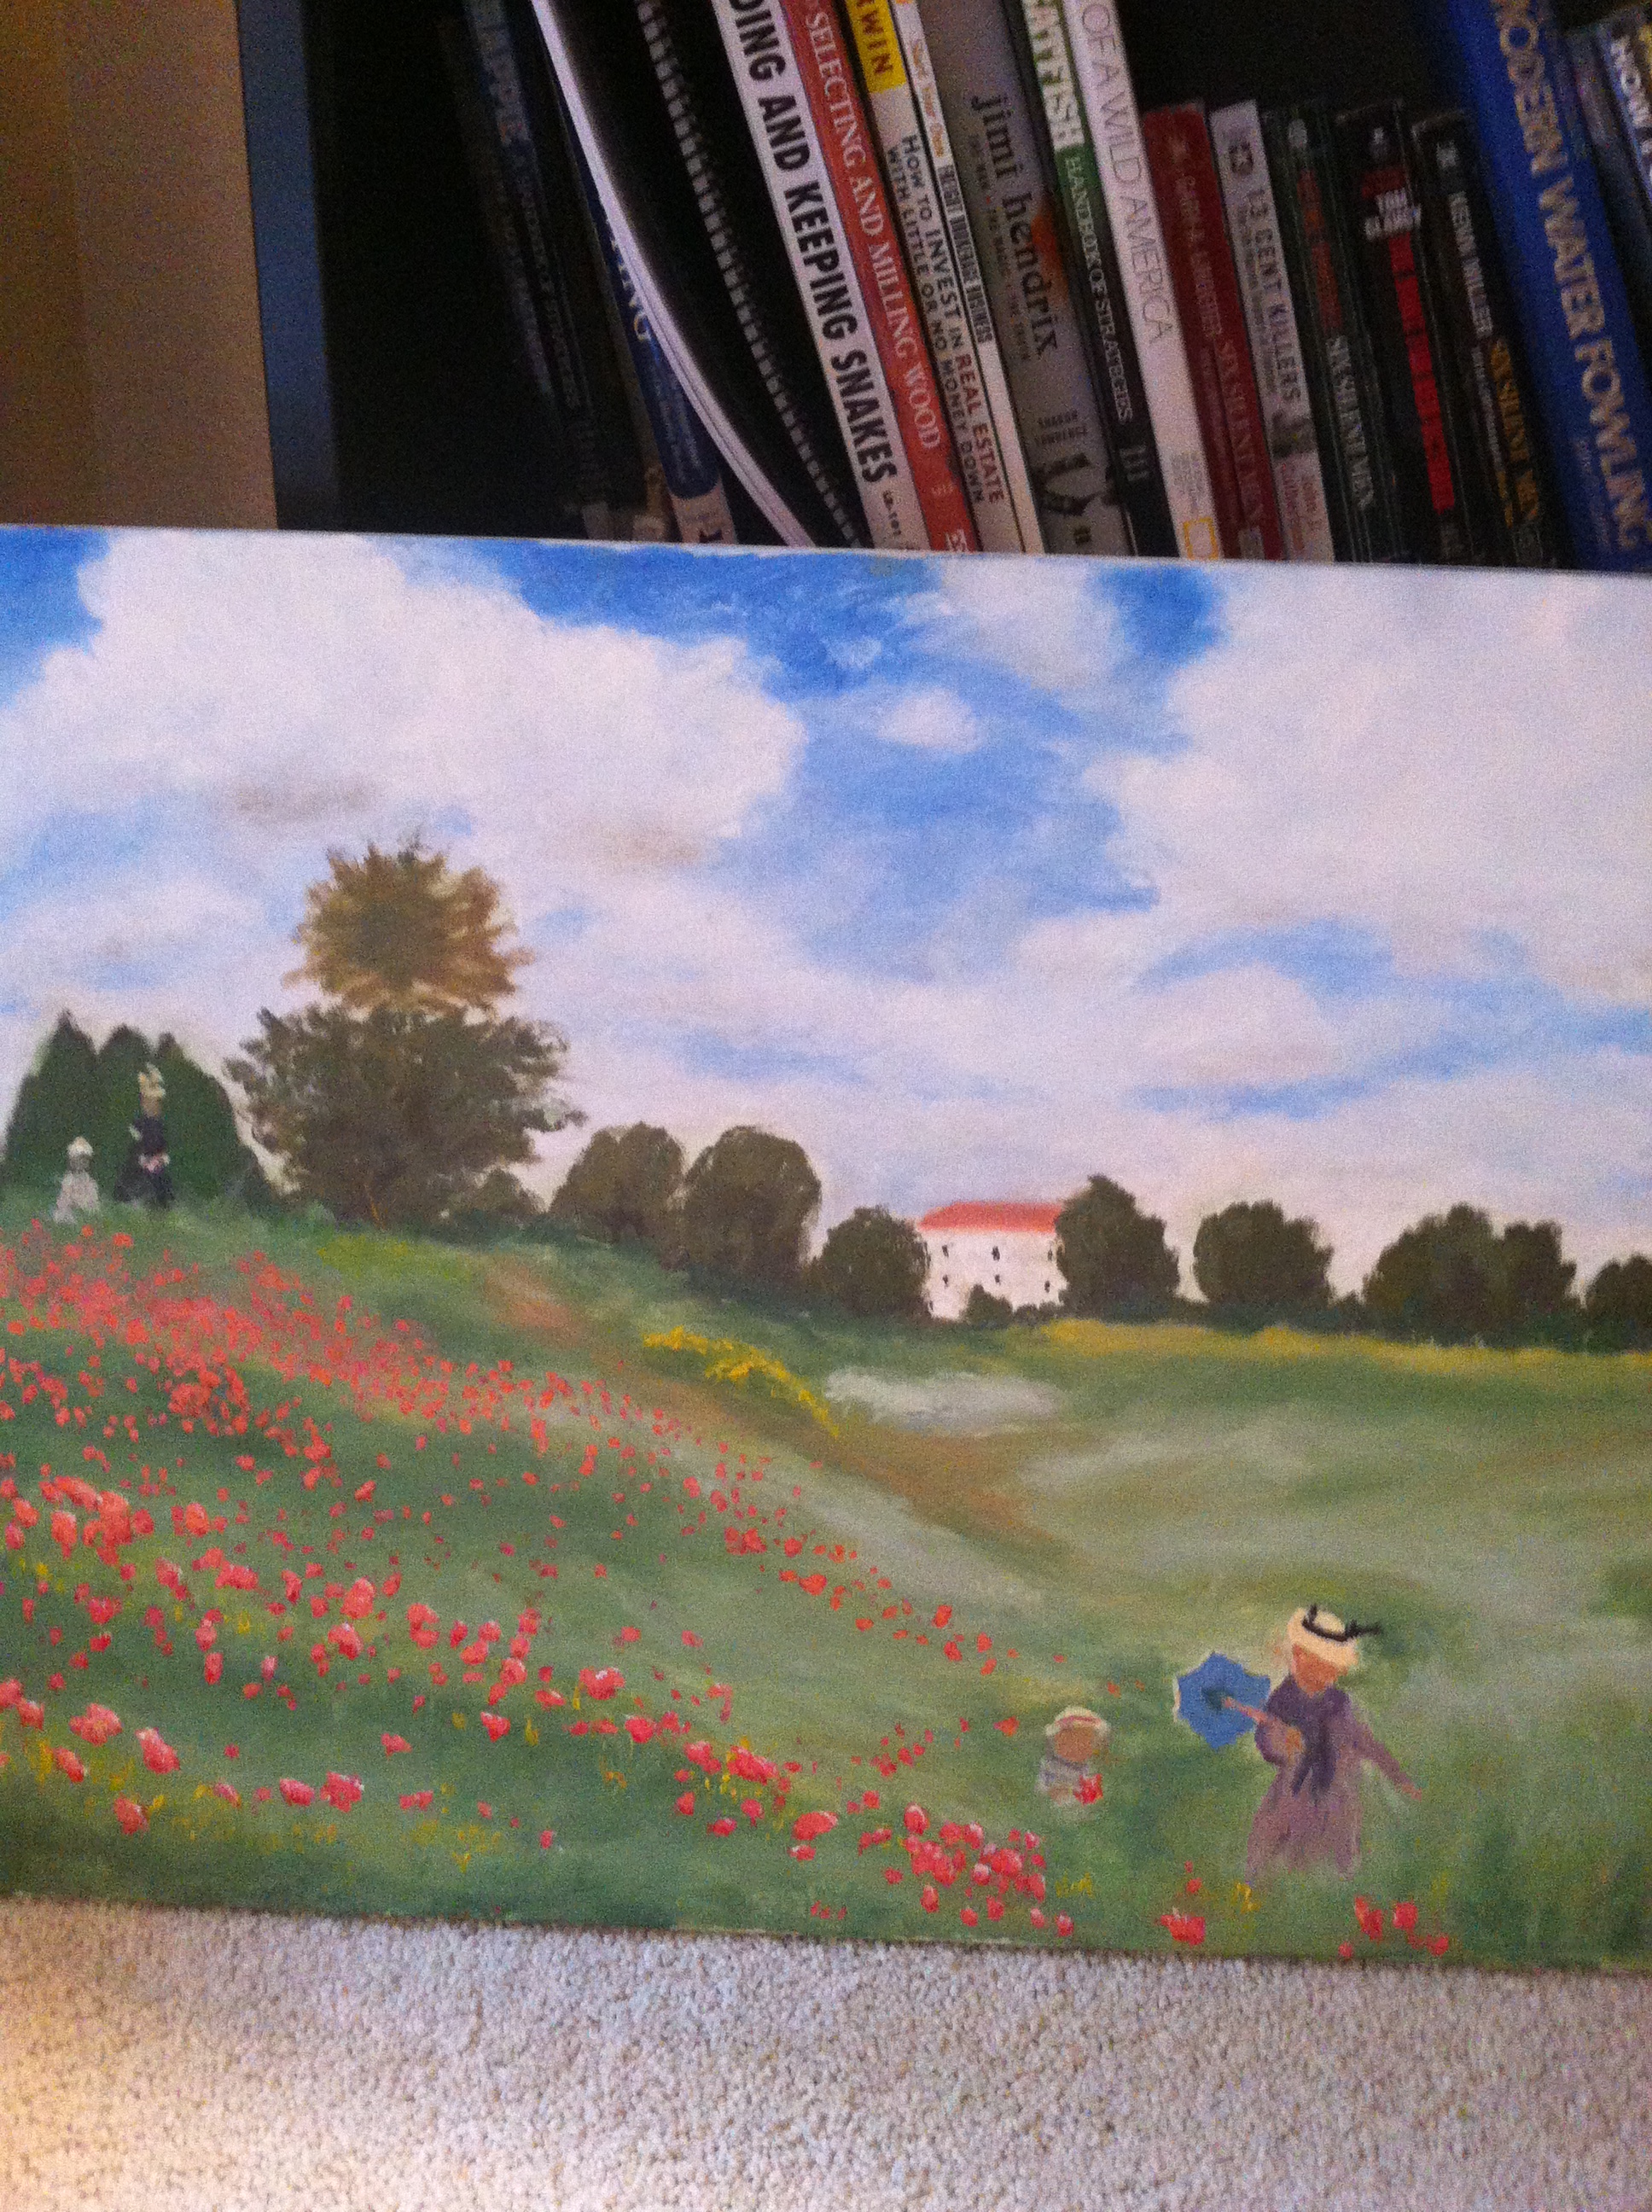
End of the second day’s session. Most of the major objects are blocked in. After the paint dries for several days I will work glazes in and use more of James Groves’ “Cole’s Copal Varnish” in the paint, which allows thick applications for highlights and details, without paint slumping

Tool carrier build

A year or so ago I built a “crappy” pine tool carrier to hold my growing collection of hand tools:

IMG_0304

The first dovetail I ever cut

It did the job for awhile, but I rushed the design in my fervor the learn how to dovetail properly.  That was my bad, but now I have a good reason to build another bigger, better box.

Again for this project I resorted to pine since this box will get beat to crap over my lifetime and it would be a shame to subject maple or cherry to this abuse.  A single six-foot 1×12 provided all the material I needed.

IMG_1258

1 inch at a time

Corners were all dovetailed, and I needed a pattern to lay out the shorter sides that would accept the carrier handle.  Looking around the kitchen, I found the perfect curve to copy:

IMG_1259

Nice.  Coping saw followed the line and spokeshave smoothed out the saw marks.  It got pretty intense.

IMG_1261

Andew W.K would be proud

I had just sharpened my chisel set and since I can be in a hurry when working, I managed to cut myself a few times and coat the pine in blood.  It seemed only right to give the piece a coating of blood red milk paint, omitting the inside of the box and the handle due to heavy wear.

Get a custom piece
Contact me to get a quote on a custom furniture piece. I can build just about anything out of wood so just ask. Email me at bradley.lindblad@gmail.com or text or call 701-793-5759.

BNSF reclaimed oak sofa table, part 3

After inlaying some butterly keys and building in a sweet haunched dovetail for the left leg, all I had left to do was cut some tenons and mortises to fit the other two legs.

IMG_1172

Nice tenon, poor vocab

I originally was going to cut through tenons, which would show through the top of the table.  I decided to do a haunched tenon after a solid weed of negative temps and subsequent finger arthritis.  Getting old sucks.

Then I did a dry fit:

Not too shabby. I shaved the corners of the tenons a bit so they didn’t bind or crack with seasonal humidity changes.

IMG_1221

Glue up

The last major task was to fill in the large cracks that the butterfly keys were bridging.  PC Clear Epoxy was the brand of 2-part epoxy I used, mixed 50/50 with crushed turqouise rock.

IMG_1215

Pretttty

Now it’s all over but the crying.  I spent about 4 hours sanding and finish-planing the piece.  Anything rushed in this stage will show forever.  Three coats of Tried and True varnish oil completed the piece.  It’s important to note that I sanded up to 1200 grit before applying the finish.  Satin smoothness was the result:

BNSF reclaimed oak sofa table, part 2

After the dovetail keys were installed across the large cracks at either end of the top, it was time to attach some legs.

I decided to make a 3-legged table, because why not.  On the end with one leg, I decided to use a haunched dovetail.

I began by sawing out (by hand) the general shape of the dovetail, and then sawed into the end grain to make the shoulder.  This shoulder will help with the gravitational pressure downwards.


IMG_1162

The quartersawn oak was tricky to work due to its tendency to split.  You can see the one shoulder were a split started.  I should be able to wick this up with some CA (super) glue.

Get a custom piece
Contact me to get a quote on a custom furniture piece. I can build just about anything out of wood so just ask. Email me at bradley.lindblad@gmail.com or text or call 701-793-5759.

BNSF reclaimed oak sofa table, part 1

I stumbled upon some quartersawn red and white oak in 8/4 thickness (2″) on some BNSF railcars.  The thick wood is used as dunnage to secure heavy loads to the wooden beds of railcars.  I need some heavy (read: expensive) material for a sofa table for my new house and this stuff fit the bill perfectly.  Some of the slabs were rotted out and most of them had cracks; the perfect opportunity to experiment with dovetail keys, or “butterflies.”

IMG_0323

Some drill and chisel work

IMG_0324

The red oak should complement the brazilian walnut nicely


Pastoral glazing study


"Pastoral Landscape", 5"x7"  oil on panel

“Pastoral Landscape”, 5″x7″ oil on panel

A small sketch using a new Copal varnish as medium: James Groves’ Cole’s Copal varnish. The scene was taken from a larger painting by GH Durrie, who was a mildly successful 18th century American painter.  Next on the agenda is to do a master copy of the full-size 18×24 painting:

"Landscape with Cattle"  GH Durrie 1859.  Oil on canvas  18"x24"

“Landscape with Cattle” GH Durrie 1859. Oil on canvas 18″x24″